Since we have taken a short break from the renovations it has started to feel a lot like christmas round here.
I thought I would share with you some more super-easy christmas tree decorations
 |
| Xmas of another year... don't worry, I'm not a crazy November tree person |
For the garland over the picture-frames have a look at my other
How to... origami xmas decs
Today I am going to talk you through making the little parcels hanging on the tree.
This is an standard, ancient origami model, occasionally called the
chinese water-bomb or the chinese balloon.
(and yes, it can be filled with water and thrown at people, but lets save that for a warmer day)
* * *
I prefer to use
proper origami paper (it is the right weight and has nice colours)
but you could use any medium weight paper as long as it is
square.
A wee bit photo heavy here, but it shows you all the steps you need.
 |
| Start with a square |
 |
| crease the diagonal |
 |
| crease paper along other diagonal |
 |
| crease the centre |
 |
| Now crease the other centre line, doing this one 'wrong side out' helps with the next stage |
 |
Oops, bit of a skip ahead here...
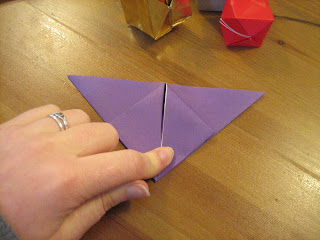
using the creases you made, you should form your paper into this shape |
 |
Now fold up each point to meet the centre point
|
 |
| Do the same on all four pointy out bits |
 |
| Like this |
 |
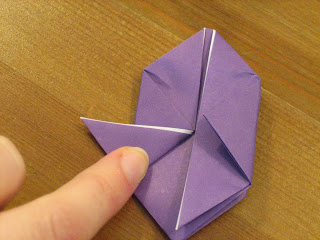
| You should now have this shape |
 |
| fold in the outer points to the middle |
 |
I've zoomed in now...
Fold the same for all 4 sides |
 |
It should look like this...
(hidden a bit by my fingers here, but you can see in the next photo) |
 |
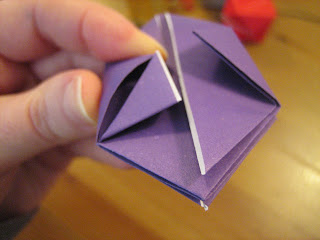
Now you need to tuck in the dog-ear bits
So crease them to start with |
 |
| Then fold them in half |
 |
| Now you need to fold this into the open pocket |
 |
just bend it down and pop it in
your creases will help it go to the right place |
 |
| You'll need to give it a bit of encouragement |
 |
| here's a photo without my finger in the way |
 |
| so it should look like this |
 |
| Then repeat with all 4 dog-ear bits |
 |
| get in there you! |
 |
| It should now look like this |
 |
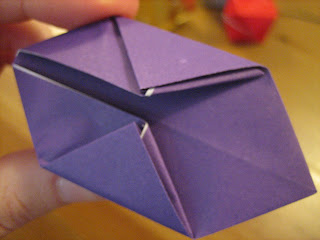
The next bit is easier if you make yet more creases
fold the top and the bottom in to the middle (as if you were making a square) |
 |
| ^ Your creases should fall like this ^ |
 |
Now face this end towards you... and blow into it
I love this bit :) |
 |
| Ta-Da!!! |
 |
| To make it hang tie a piece of thread to a paperclip |
 |
| and push the paperclip in like so |
 |
| All done |
Now make another 49 and hang them on your tree!
The Nitty Gritty:
I use
folded square origami paper,
(15cm x 15cm - 80gsm) it is good quality, FSC-certified, comes in nice colours and they are a UK company.
You can get origami paper at any number of
on-line retailers but quality varies. I used to get amazing origami paper from a Chinese gift shop in Glasgow, but it sadly closed down.
I personally wouldn't use the expensive 'washi' paper for this as it can be difficult to do the more fiddly folds
If you can get metalic paper it makes really nice decorations, not very eco-friendly but pretty.
You can see my other "How to" on origami xmas decs
If you make some of these let me know how you got on and share some pics of them :)


This takes me back to my childhood, we used to make these, fill them with water and throw them at each other :-)
ReplyDelete